Justabitfrayed.com

Hello everyone!  In case you haven’t seen, I have a new blog!  I’m going to be taking all my tutorials and content from this blog and moving it over to http://www.justabitfrayed.com !  I have a shiny new blog and a really cool new logo designed by my friend Christine over at Crush Creative Lab!

Image

Make sure to add me to Bloglovin’ or your new preferred reader.  With this new blog I am also going to be selling quilting patterns!  I’m proud to announce my first quilt pattern, the 12th Street Quilt!

 12th Street Quilt Pattern - quick and easy quilt pattern

Hop on over to the new blog and read all about it!

Brenda

Posted in Uncategorized | Leave a comment

Sweet Diamonds Top Finish

Ta Da!  Even though I have been busy getting the new brick and mortar location for Pink Castle Fabrics ready (soon!  very very soon!) I somehow managed to finish a quilt top.  Back in September of last year I started this quilt.  I couldn’t sleep one night and I was browsing Pinterest on my iPhone (as I do most nights) and I decided to just get up and start making a quilt.  I really liked this quilt and I just started pulling fabrics.  It’s a pretty simple and traditional pattern but I wanted to take it a more modern and bright direction.

I’m very excited with the way it turned out.  And I’m really loving the Spot On tiny dots from Robert Kaufman.  I used them here for the sashing and the small black squares.  It’s really a great size dot and very “in” right now in fashion.   Here’s a closer photo for a better view of the sashing:

My sister is already trying to claim this quilt.  We’ll see Lauren!  Now to decide how to have it quilted…

Also!  if you don’t already own the Fat Quarterly Shape Workshop for Quilters: 60 Blocks + a Dozen Quilts and Projects!
RUN to Amazon and grab it now for only $5.11!!

Posted in quilt | 3 Comments

All About 108″ Wide Backing Fabric for Quilts

Hello friends!

I’m very excited today to talk to you about 108″ wide backing fabrics.  Quilters in the traditional world have known about these extra wide fabrics for a while now but companies are just now getting on board making wide fabrics for the modern quilter.  What this means for you, the modern quilter:  no more piecing backs.  Unless you want to of course.  My good friend Katy has been pestering companies for the last few years about printing wide goods with more modern appeal.  And she has succeeded!  Big thanks go out to Katy for all her hard work in this area.  

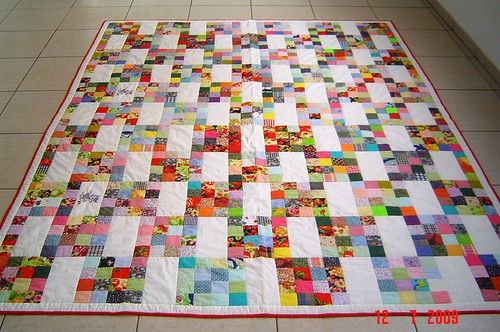
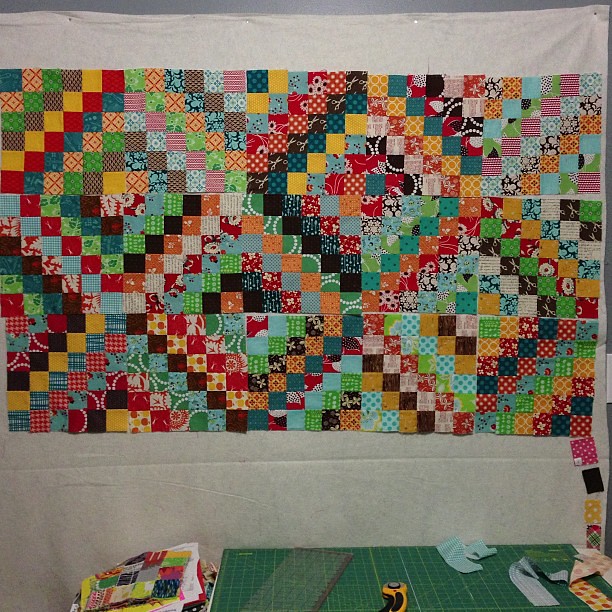
Let’s talk about a few rumors for a moment shall we?  I have seen in books, heard people talking about, and seen online that one of the things that make quilters modern is having a pieced back on the quilt.  When I asked about printing modern 108″ wide fabric to a few companies they have even mentioned that modern quilters like to piece backs.  I think this is really out of necessity rather than modern quilters “liking” to piece a back!  There were NO fabrics out there in wide goods that modern quilters WANTED to use to back a quilt!  Hello?  What else can you do then?  Piece one!  Duh.  I’m not going to spend a lot of time and fabric on a beautiful quilt top and then slap on a Civil War repro to back it.  It won’t match for one and it’s really just not my style.  And I want the work I create to reflect myself and my personal style.  There are times, like on a beautiful scrappy quilt top, when I think a pieced back makes a lot of sense and that is the direction I would go.  But what about the times where I want a cleaner look?  I want just a simple plain back sometimes.  AND sometimes, I really don’t want to spend all the time piecing a back.  Not only that but I don’t want to use up my stash on a backing.   There are times when I just want to have something with no seams for the look I’m going for.  

In one conversation I had with one of my fabric reps about printing wide goods he said to me that quilt store owners won’t buy 108″ wide fabrics because they are too expensive and they believe their customers won’t buy them.  SO, the companies think that they shouldn’t print them because the shop owners won’t buy them.  They believe that quilter’s just buy up sale fabric in yardage for quilt backs and piece backs.  SURE, of course that happens.  I do it!  But again, there wasn’t anything at all I wanted to buy in wide fabric to back my quilt in.  Let’s dispel this rumor right now.  108″ fabrics ARE NOT EXPENSIVE.  Let’s do some math!  

Brenda (that’s me!) has a queen size quilt top that is 81″ x 88″ big.  If I were to piece (let’s just say sew some fabrics together, with no fancy design or blocks on the back) a back using 44″ wide fabric I will need 5 yards of fabric. Let’s say I find this fabric on sale for $7/yard.  I will pay $35 for the fabric and I will have to take two 2.5 yard cuts and sew them together long ways.  Not too bad, good thing I found some sale fabric. If I were to instead choose a 108″ wide backing I will need 2.5 yards for the back. The Robert Kaufman Spot On Wide fabric is $15/yard right now at Pink Castle Fabrics.  So this would cost me $37.50 and I wouldn’t have to sew anything together!   See!  Yes, the price per yard is more.  But the price/square footage is less.  Make sense?

Let’s review the reasons why we like 108″ wide backing fabrics before we move on.

  1. Saves time – not piecing a back can save you hours of time
  2. Saves money – yardage of 108″ wide costs less per square foot
  3. Cleaner look – no seams on the back of your quilt

Now you are thinking, “Okay, then how much 108″ wide fabric do I need to back my quilt?”  No problemo.  I put together (by “I” I mean, Jason made them for me) a series of graphics showing you how much yardage you will need for standard size quilts and a cutting guide for each.  I included 4″ around each side for overage and this is the typical size over that a longarmer will ask you to make the backing.  

* For baby/crib quilts you can actually get 2 backings with 1.5 yards of 108″ wide fabric.

Image

For the lap size (60″ x 75″) there are 2 ways that make sense based on the 108″ wide fabric.  The first you need 2 yards of 108″ wide fabric.  You will have a 25″ strip left over which is enough to back 2-4 throw pillows.

 Image

If you orient your fabric the other way and buy 2.5 yards of backing fabric, you will have a 40″ wide strip on the side extra and it’s big enough to get 1-2 baby size quilt backs out of!  

 Image

Image

Image

Image


The king size will be a little tight and you may want to add fabric in the middle to make it bigger and buy an extra half yard for length.  But if your king size is smaller than mine it might work out just right. 

Image 

We will be searching for modern 108″ wide fabrics and updating the collection as we find them.  Click the logo below to go to our wide backing section of the shop.  

Image


The best thing we can do to encourage fabric manufacturing companies to continue to make more modern 108″ backing fabrics is to buy them!  Ask your local quilt shop to stock 108″ fabrics you like  and ask tell the manufacturers what type of fabrics you would like to see in 108″ wide fabrics.  

I’m interested to know what you think?  Do you like piecing your own backs?  Are you excited about the 108″ wide fabrics that are coming out?  What would YOU like to see printed on wide fabric?  


~Brenda

Posted in Uncategorized | Tagged , , | 24 Comments

Hello everyone!

In case you haven’t already heard I’m happy to announce that I will be putting on Camp Stitchalot this May!

Image

Pink Castle Fabrics is putting on this fun event.  Click on over to find out more about the event and SIGN UP!  See you there!

Posted on by justabitfrayed | Leave a comment

Nap Blanket Tutorial –

Image

We just got in all these wonderful Sketch Flannels in our shop last week.  I kept looking at them and going over to pet them and I decided I HAD to make something with them.  I made my son a new nap blanket to take to preschool.  I have made several of these in the past for baby receiving blankets and I thought, “Hey!  Those are still big enough for toddlers.  I should make one for my son.”  I also try and tell people how to make one so often in my shop when I’m talking up easy and quick baby gifts that I decided to make a tutorial up to reference instead of just wildly flailing my hands in excitement and trying to explain it.  

Finished size:  34″ x 38″

Materials Needed:

1 yard of quilting weight cotton (or voile, or lightweight linen, or brushed cotton, or more flannel) 

1 yard of Flannel

6″ diameter circle template (I used a small mixing bowl, you could also use a small plate or saucer)

Image 

I used Sketch Flannel in Cream and Piggies in Green (by Heather Ross)

*note – both the flannel and the lightweight linen that I used were 44″ wide.  Other widths are okay, you will just have to cut them to match.  i.e. if one is 54″ wide and one is 44″ wide, you will have to cut the 54″ fabric down to 44″

Step 1:

PREWASH your Fabrics – Flannel and quilting cotton shrink at different rates.  Wash and dry them the same way you will this blanket when it’s all done.  I just put the two fabrics in with a load of my son’s clothes which is where it will go after it’s used.  Press them well after they are dry.

Step 2:

Trim your fabrics to match – First you will want to trim off the selvedge edges of your fabrics. 

Image

Depending on shrinkage you may need to trim the fabrics to be the same size.

Step 3:

Pin the edges RIGHT SIDES TOGETHER leaving about 6″ space for turning.  I’m using Wonder Clips here in the photo instead of straight pins but they work the same way.

 Image

Step 4: 

Sew a 1/2″ seam around all edges. EXCEPT your 6″ opening for turning.  Backstitch when starting and finishing.

Step 5:

Trace the curve of your 6″ circle on the corners of the blanket. I used a small bowl 6″ in diameter for tracing my curved corners.

 Image


I use a Sewline Fabric Pencil (which comes off with water) on the wrong side in the corners.  trace the curve from stitch line to stitch line like shown.  I darkened the stitch lines with the pencil to make it easier for you to see.  Do this on all 4 corners.

Step 6:

Sew on your new curved lines. Sew directly onto the lines you just traced.  Backstitch at the beginning and end.

 Image

Step 7:

Trim the corners 1/2″ from your line. Cut the excess fabric from the corners carefully.  Be sure not to cut your stitching lines.

Image 

Step 8:

Turn your blanket.  Push the right sides of the fabric through the hole you left.  Make sure to get the curved corners pushed out pretty good.

Image


Step 9:

Press all around the edges of your blanket.   Make sure you fold under the open edges and press well so the raw edges are enclosed.

Image

Step 10:

Edge stitch 1/8″ all around your blanket.  This will close up your hole and make a pretty edge all the way around.  You could use a decorative stitch here if you’d like too.  Make sure to backstitch when you begin and end.

Image 

You’re DONE!

Now, you just cuddle away! 

Image

Image 

Pretty easy huh?  Don’t forget about these next time you need a baby gift!  

~Brenda


Posted in Uncategorized | Tagged , | 2 Comments

Leaders and Enders – 2 Quilts in the Time of 1

Okay, so maybe not exactly 2 for the time of 1.  But, so far on my Leaders and Enders journey, I’m seeing some progress on a second quilt in between piecing a few others.  So, the concept behind Leaders and Enders is easy, if you aren’t sure what it is, Bonnie Hunter has a great informational post about it here.  A few months back after I read this article I started using some 2.5″ square scraps as leaders and enders and made them into these 16 patches:

16 patches - Leaders and EndersI think I’m up to 25 now?  I’ve been making these Scrap Vomit style, not caring what I pick (except if they are the same fabric) and sewing them together with no rhyme or reason.  I make 2 patches into 4 patches into 8 patches into 16!  Mindless.  And very easy to do if you have a bin of squares next to your machine ready to sew.  I’m actually running out of squares quite often and having to stop and cut more of them up.  I’m really thinking I might get one of those fancy cutters like an Accuquilt or a Sizzix to make that part faster.  I have a ton of scraps I could easily make into squares.  Anyway, I’m hoping to make 66 of these 16 patches for the project I have in mind which is inspired by this quilt I saw on Pinterest:

Lovely, isn’t it?  Anyway, that’s the plan with those.  I will keep leading and ending along.  I am so pleased with how easy those are I’ve been thinking about options for when this project is finished.  I got Bonnie’s book Adventures with Leaders & Enders in the mail last week and got around to checking it out the other night.  I really like the explanation Bonnie gives about how she sorts her scraps and the different sizes she cuts them into.  I’m going to have to get some more clear bins and label them to start this process.  She cuts her scraps as she’s working on yardage projects.  This would help me keep my scrap bin to a manageable size.  It’s running over right now…

I’ve been working on a quick quilt using Fat Eighths of Boho, the new line from Urban Chicks that will be out this Spring.  I picked it up at quilt market in Houston this fall and I wanted to do something quick that will show off the prints.  I hope to use it as a sample in my shop (opening brick and mortar in Ann Arbor soon!).  Here’s a not so amazing iPhone photo to show you the progress.  I’m really lazy about getting the camera out.  I need to get one of those magic WiFi SD cards…

Boho by Urban Chicks

The pattern is pretty nice, it uses almost the whole fat eighth (9″ x 22″).  There is a small piece left over and I’m only using 30 prints from the line.  Hopefully there will be more progress on it this weekend.  

Also this week Debbie from Esch House Quilts and I were invited to speak at the Log Cabin Quilters guild meeting this week out in Kalamazoo, MI.   It was a lot of fun talking to the ladies about modern quilting and showing off some of our own work.  They had about 80-100 ladies at their meeting which is a lot more than in our cozy Modern Quilt Guild.  Everyone was very welcoming and enthusiastic about our talk which was really fun.  I’m really glad we were asked to join them for an evening.

I’m also glad that I have NO plans this weekend.  (Last weekend was my birthday so we celebrated and cleaned all weekend.)  This means I will have more sewing to show off to you soon!

~Brenda

Posted in Uncategorized | 4 Comments

Scrappy Trip and Pinwheel Tops Complete!

Well, I must say, last week’s retreat was a productive one.  It helps that I did’t have to cook or clean or work and the internet and phone signals are spotty at the Inn where we hold our retreats.  The weather was pretty dull today so I’m just going to show off with my iPhone photos instead of fancy camera ones.

I’m really pleased with the way my Scrappy Trip Along quilt top turned out:

Scrappy Trip Around the World Quilt Top

The blocks are each 12″ squares finished.  This top is 60″ x 72″.  It’s a little too big to fit in my new Bernina (I got the 350 patchwork edition a few months ago) the throat space is really small.  I’m actually going to get this quilted by a local long armer once I decide on a backing and piece it.  This will be my first time having someone else quilt my quilt (that sounds funny, doesn’t it?).  It’s actually pretty inexpensive (1.5 cents per square inch) to get the edge to edge (mostly done with a computerized program) designs.  I have to say, I feel a little weird taking this to have someone else do the quilting.  I kind of feel like I’m cheating if I don’t do all the work myself.  And I feel even worse just choosing a computerized design and not having a quilt artist work some magic on my quilt.  I’ve been thinking and thinking about it and after talking to a few of my friends like Rossie, who regularly sends her quilts to a long armer and Tia, who is a fabulous long armer, and I’ve decided to make peace with my inner monologue and not feel guilty about it.  Honestly, I don’t love the quilting part of making a quilt, making the top is really what I like to do and sending some of the quilts I make out will allow me to make MORE quilts.  I can still decide to quilt something myself if it’s something special.

Speaking of quilt tops, I finished the Scrappy Trip Along quilt top AND I finished up this pinwheel quilt top.

Pinwheel Quilt Top by Just a Bit Frayed

This was a nice quick and easy quilt top.  It’s 62″ x 62″.  I think it’s a little too small and if I make it again I will make it bigger but I really like the way it turned out other than that.  I decided to set the blocks on point like this to give the pinwheels a little more movement.  It did make the top take a little longer but really it wasn’t that bad.  This was my first time setting blocks like this.  I’m glad I was at the retreat when I did it and had Lynn and Ginia there for some hand holding and advice about all those bias edges.  I decided to piece the rows with extra squares on the rows and then I added a border for stability (and I like that it makes the blocks look floatier) before cutting them down to triangles.  This way I didn’t have to add the border to a bunch of bias edges and have the potential for the top to warp.  TA DA!  A productive weekend indeed!  I also got some fabric for another top all cut up that I will show off some other time.

In an effort to organize my sewing life a little more I caved and bought myself this cute little Forest Friends Quilt Journal.  The cover has an adorable original design by Aneela Hoey (she blogs over at comfortstitching if you don’t already follow her) and the pages inside are really nice quality and the back has some graph paper for drawing blocks.

Forest Friends Quilt Journal by Aneela Hoey

I also threw her new book Little Stitches into my cart (had to get the FREE shipping…) too.

Little Stitches by Aneela Hoey

I have some Cosmo floss here somewhere in my messy studio.  And I hear a rumor that Aurifil is coming out with a line of embroidery floss soon!  I am really excited to get my hands on some of it as soon as I can and try it out.  I use Aurifil thread exclusively now.  If you have never used it, you really should try it out.  Get a spool of 50 weight for piecing and 40 weight for quilting and see for yourself!

~Brenda

Posted in Uncategorized | Tagged , | 5 Comments

How many Strips Does it Take? – a cutting guide for the Scrappy Trip Around the World Quilt Along

Last night I got another 6 strip sets all sewn up for my Scrappy Trip Along quilt.

sewn strip sets

I didn’t have a whole lot of sewing time but it was nice to see some more progress.  I’m totally excited to get this top finished.  Especially after seeing Katy’s and Rita’s finished.   And wow! there are a lot of amazing quilts being shown off in our Flickr group and on Instagram (search #scrappytripalong).  There’s now over 300 people in the Flickr group and over 750 photos with that IG hashtag.  Amazing.  Seriously, I think that the amount of people who are excited and involved in this quilt along is awesome.  Just chatting with a few people it seems that these informal types of quilt alongs are just what people need.  I know I get asked several times a week if not daily to have Pink Castle Fabrics sponsor some type of blog hop, or quilt along, or whatever.  I don’t think everything out there needs to be some sort of moneymaker or competition.  Even those of us who sew/sell fabric for a job still got into this gig because we like sewing!  I know I’m not the only one out there who is exhausted and just misses sewing for fun.  Katy and I talked about instigating one new informal quilt along each month this year.  Something simple and quick and stash/scrap busting.  No contest, no deadlines, no strings.  Just pop a tag on your smart phone photo of your progress and oogle at others’ beautiful work.   What do you think?  Are you in?

Since this Scrappy Trip quilt is my favorite quilt right now I think I’m going to make another, possibly as a leaders/enders quilt.  Bonnie K. Hunter, the woman behind the tutorial for the Scrappy Trips, also has a great post about what are leaders and enders and a book, Adventures with Leaders & Enders: Make More Quilts in Less Time! (which I just ordered tonight).  I learned about them from Rossie who has made several quilts using this technique and I’m a little obsessed now that I’ve tried it.  I’ve just been sewing 2.5″ squares together and I now have a bunch of 16 patches for another project.   I will show off more about them soon.  Anyway, I digress, I need to know how many strips to cut up and put in a bin for my next Scrappy Trip quilt once this one is complete.  So, here’s some quick math for all of you (I mean, I already did the work…):

Scrappy Trip Around the World Cutting Guide by Just a Bit Frayed

I’m not sure I’m ready to go Queen…but who knows…

I will have a lot of sewing to show off next week!  I’m going to a quilting retreat this weekend with the Ann Arbor Modern Quilt Guild!  YAY!!

~Brenda

Posted in Tutorial, WIP | 21 Comments

2013 – The Year of the Stash – Use Those Beautiful Fabrics This Year!

For months I’ve been wanting to get back to blogging for myself.  Don’t get me wrong, I love my shop and my job but I have been working too hard and neglecting myself personally.  It’s hard being a small business owner and still taking some time for yourself.  I got into this business for one reason.  I love to quilt.  I wanted better access to all the modern quilting fabric I wanted to buy for myself and more money to buy it.  Long story short, I now own a fabric shop and have an amazing stash.  It’s just that though, a stash.  Fabric that sits on shelves surrounding me in my office while I do business-y things all day long.

Well, not anymore.  I’m publicly claiming that in 2013 I will use my stash.  Lord knows I won’t be able to use all of it but gosh darnnit, I’m going to sew and I’m going to use it.  Let me be clear though, I am NOT on a fabric diet.  I disapprove of Fabric Diets for several reasons:

  1. I own a fabric store and I need people to buy fabric so I can pay my mortgage.
  2. Sometimes you need other fabrics to match what you already have so you can use them.
  3. Sometimes you find fabrics that you want but will go out of print and you won’t want to miss out.

At least for me, limiting myself to never buy fabric squashes my inspiration to create.  So, I have beefed up my Pinterest boards and I am ready to create!

I’m not going to get into the exciting world of HOW to set goals in this post, I feel it will deserve several posts over the month, I’m going to show off my first project to finish up this new year:

Scrappy Trip Around the World Quilt

15 blocks into the Scrappy Trip Along

I started this bad boy a few months ago after seeing the amazing quilt on Pinterest by Patch Andi (click that link and see it!) and Googled and found an amazing tutorial on how to make this quilt here:

http://quiltville.com/scrappytrips.shtml

Megan over at Lucy and Norman started making one and put it on her Instagram and that was all the inspiration I needed to get mine back out and get it done!  The blocks go together pretty quickly and it’s a great way to use up some of the bigger scraps that I have (most of mine are bigger scraps).   I have a ton of work to catch up on today but hopefully I can get a chance to sew later tonight!  I watched some Netflix TV (Gossip Girl, don’t judge!) and cut up  a lot more strips and I am just itching to sew them.

We started a Flickr Group for everyone to post their own Scrappy Trip Around the World Quilts.  I love to see how quickly they are all getting done and how each one is different.  I’m already planning #2.  Make sure to pop over to Rita’s blog over at Red Pepper Quilts, she is finished with hers and it’s amazing (as usual).  Katy over at I’m a Ginger Monkey will have hers to show off soon.  I just can’t keep up with these ladies!  They are incredible!

Hopefully, you are all inspired to get out your own scraps and make a Scrappy Trip Around the World Quilt.  I’m going to do up some math and cut strips ahead of time for another so I will post it for you all tomorrow.  Make sure to follow me on Instagram – justabitfrayed and use the #scrappytripalong hashtag to link up your photos on IG!

Posted in Uncategorized | Tagged , , , | 11 Comments

New Quilt Pattern – Pieces of Nine

Do you ever get an idea of a quilt stuck in your head and you just have to do it?  That happened to me this week.  I had an idea for a new quilt pattern and I couldn’t wait to figure it out.  I love scrappy quilts and being able to use up scraps and I whipped up this little number this week:

Pieces of Nine

Crib Size

I’m going to work on a .PDF pattern for this quilt and some other sizes this month.  Here’s a glamour shot up close for you:

Fun huh?  I really like it.  The colors are nice and bright with the white background.  There are a lot of really good prints in there too.

Other than that I’ve been busy cleaning up the shop this month.  There are about 11 more lines of fabric coming in the next six weeks!  I really have no idea what I’m going to do with them all…you guys will help me by buying them, right???  !!!

SO!  I put 60 more bolts of fabric in the $5/yard SALE for you to snatch up.  This is perfect for quilt backs and wearable muslins 🙂  Just saying…

Posted in Uncategorized | 8 Comments